
Technology
Create a widget for our iOS app using SwiftUI


During the last three months, we worked on a new side project for our mobile app and here is how it went.
You might already know that, at lastminute.com, we don’t have anymore Fridays, but we
have FriYAYs.
We are free to learn and experiment with new technologies to help us and the company grow so that our apps and websites
are always cutting-edge in terms of technologies and user experience. During these days, you are the owner of your time.
As for learning and development, our Tech people have the autonomy to shape their FriYAYs in the way that best suits their development needs and requirements. They can:
- Invest in self-directed learning
- Harness the learning opportunities offered by other colleagues across the company, or be the ones powering those opportunities (after all, teaching is the most effective way of learning!)
- Join in-house formal training sessions or come up with new ways to maximise learning
We wanted to build something that could not miss in a 2022 app, that will focus on a specific portion of our
customers (the pro users), in line with the company goal to inspire travellers.
With this in mind, we decided to go deep into the WidgetKit framework, write the first lines of SwiftUI code and develop
our first widget for iOS.
We challenged ourselves to think and plan the whole project: we behaved as Product Owners and UX designers too. We got
in touch with departments outside our area, to understand legal constraints and marketing possibilities.
In the final steps, we of course involved the right stakeholders, asked for support from other colleagues, and got
approval.
Thanks to Aitor Azcorra Egula, Alix Connoly, Andrea Bertelli, Elena Spasciani, Lola Fathi, Luca D’Antona, Jessica Colonnese, Marco
Silva, Raffael Martinez, and all the pink colleagues involved in the project.
So let’s find out the process we follow to arrive from the initial phase until the publication on
the App Store.
Process
We started our journey as Product Owners, and as a good practice, we did some benchmarking.
On a Miro board, we analysed how other companies (inside and outside the travel industry) are using widgets for their specific purposes.
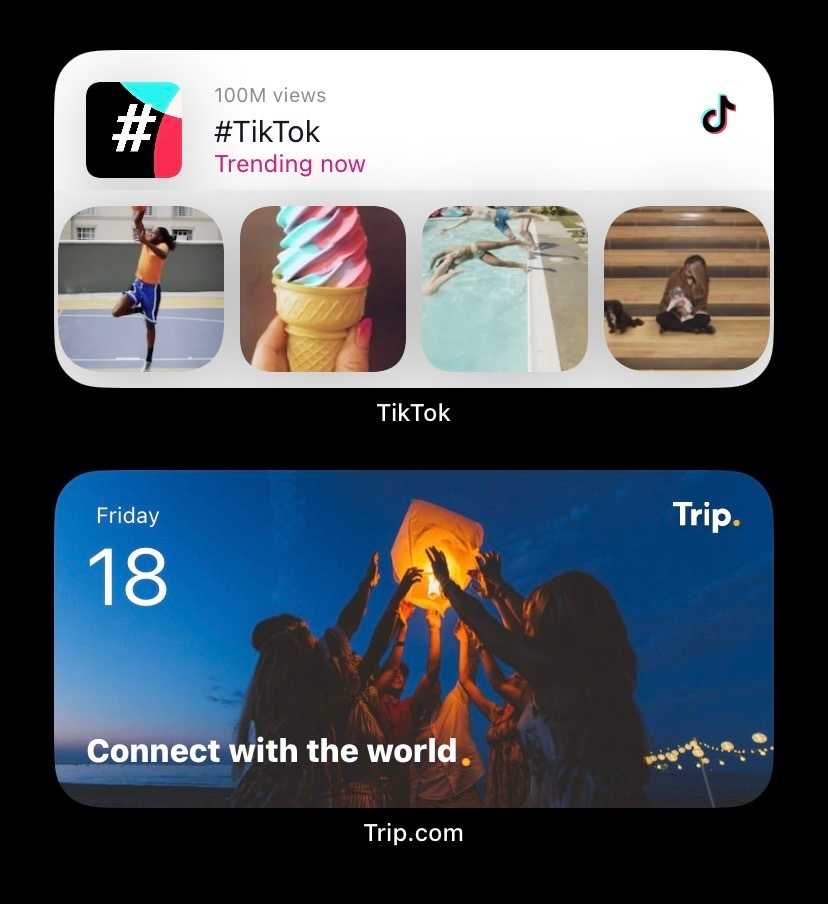
We found out that there were two main approaches to inspiring customers:
- Show multiple options, associated with a company message (ex. TikTok)
- Show a single option, with a minimal design and reduced company branding (ex. Trip.com)
We initially went for the first approach: it seemed that to truly inspire our customers we needed to follow the slogan
“the more, the better”, offering multiple options to make our customers dream and think of their next holiday as
something to be planned by evaluating different options.
Later we realised that widgets are small (extremely small) and there was too much content, and in a truly Agile
style, we shifted to the single option approach: displaying one full-screen inspiring destination every hour with a
little company branding.
Talking about technical decisions, we went with a fully native implementation.
Our app at the moment is completely developed using React Native. Widgets have hard memory constraints (up to 32MB ram
available at runtime), so it could be possible to develop them using React Native. Still, we wanted to leverage the full
potential of the iOS devices, SDKs, and integrations. Plus we were thrilled to play with the new SwiftUI framework, and
test it in production.
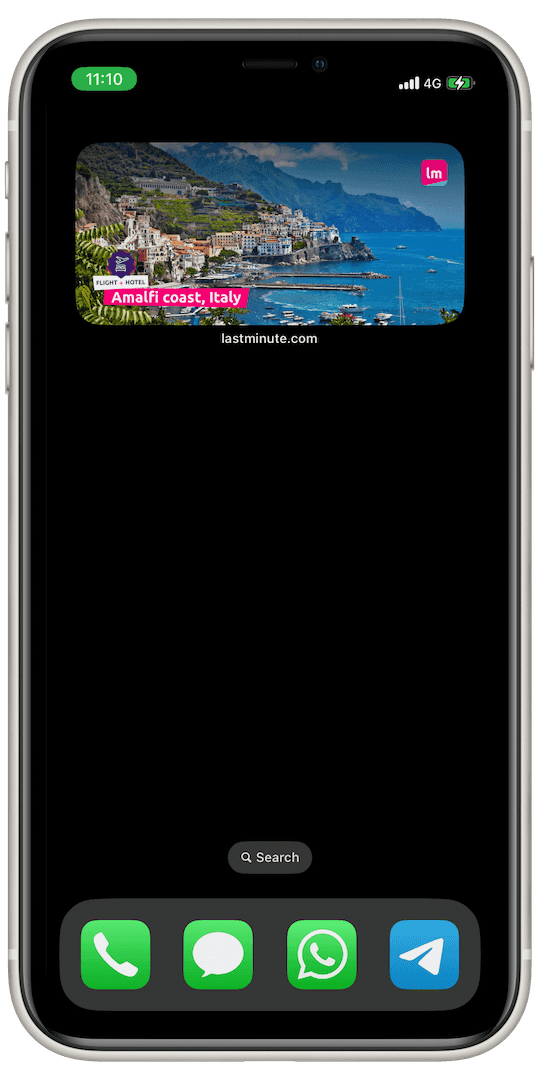
We closed the Product Discovery phase with a clear idea: a medium size widget that shows one inspirational destination every hour. The whole experience rotates around an appealing full-size image and little branding. When tapping on it, the app will open and show Dynamic Package (Flight+Hotel) results. The customer could configure the widget, providing the departure date, desired date range and the number of travellers.
Without further ado, let’s see which are the tech building blocks for our widget.
Tech overview
We finally started the part we love the most: development.
It is important to understand the technology stack of our mobile app: we have been developing with React Native since
2017, focusing on both iOS and Android platforms.
React Native has shown great potential, a small team (Marco De Lucchi and Antonino Gitto) was able to completely rewrite
the app from scratch in two years, and Product is happy too.
At the same time, we are still in love with native development, we constantly evaluate the best technology for our needs
and we appreciate that some features are faster and easier to develop in this way.
The widget is a clear example of this, while it is possible to write it using React Native, the system constraint and
the lack of features led us to choose SwiftUI and Swift.
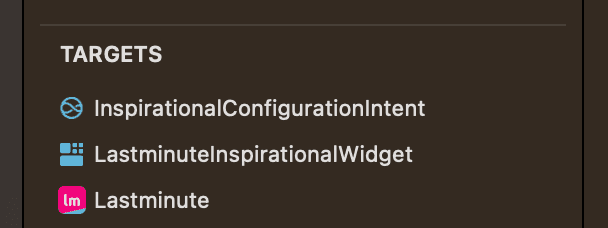
Let’s see an overview of the different parts that we had to put in place. To start, we needed a new target of type Widget Extension. It is the container for the code of the widget itself, where you can find:
- All the UI code we developed using SwiftUI
- All the business logic related to the retrieval of the inspiration locations
The destinations are retrieved from a feed via an internal system, configured on the product side and updated every day. We wrote the network client leveraging the new async/await Swift syntax. By doing so, we were able to adopt for the first time in native production code the same programming pattern we used in other languages (eg. TypeScript).
//...other code

let dealsJson: [DealServiceData] = try await restClient.getData(from: dealsFeedUrlRepository.get())
let deals = try await dealsAdapter.adapt(dealsServiceData: dealsJson, configuration: configuration)
return deals

//...other code
We created a new Intent Extension target, to make our widget configurable with a list of dynamic values. The type is the
same one used to create SiriKit Intent Extensions (seems like also Apple likes to reuse stuff  ).
).
There is some code shared between this target and the widget one: the network client and the domain objects definition.
We did this by adding to both targets in the file (but we are planning in the future to extract some code in a common
framework).
The communication between the two targets in terms of parameter values is managed automatically by the iOS SDK, based on
the configuration contained in the Intent Definition file we created.
When the user taps the widget we launch the app and start a new search. This has required integration between our native code and React Native. What we are doing is launching a custom URL that is intercepted using the Linking React Native Library. Based on the URL parameters that are created using the configuration of the widget, we launch a specific search in a new app screen. This is done by leveraging React Navigation (which we already use to manage the entire app navigation).
export class LinkDispatcher {
  // other code..

  async dispatchLink(link: string): Promise<void> {
    //... other code

    if (this.isWidgetLink()) {
      await this.dispatchWidgetLink();
    } else {
      //... other code
    }
  }

  private isWidgetLink() {
    return this.resolvedLink.includes("<our customer url>");
  }

  // other code..
}
What’s next
Do you want to know all the details related to how we developed our widget? Check out our next posts:
- “Widget for our iOS app using SwiftUI: the Technical Implementation”
- “Use SwiftUI Path and Shape to render your svg files: a practical example”
- “Widget iOS: how to fix the image bundling problem”
PS. Android users don’t worry, big news is coming for you too! 

Read next


From Months to Weeks: The Smart Way to Let AI Do a Migration


How we migrated 137 modules to a new dependency-injection pattern with AI, turning a quarter-long slog into a few focused weeks by teaching the AI instead of delegating to it, working in small supervised steps, and letting the method compound. [...]


Written by lastminute.com folks, who live for the holidays. You should follow us on Twitter.

Want to express your love for travel and tech? Well, you could read another article, or you could just come and join us. We’re always looking for talent to help us enrich the lives of travellers - find your role here.
The postings on this site are authors' opinions and experiences and do not necessarily represent the postings, strategies or opinions of lastminute.com group.