If you have been following this blog for a while, it is nothing new that we love to experiment during FriYAYs and that for some months we’ve been telling the story of our beloved iOS widget. Here you can check what we did so far:
- Create a widget for our iOS app using SwiftUI
- Widget for our iOS app using SwiftUI: the Technical Implementation
- Use SwiftUI Path and Shape to render your SVG files: a practical example
- Widget iOS: how to fix the image bundling problem
- Sharing data between a React Native App and a native iOS Widget
However, let’s be honest – there has been and will always be a rivalry between Android and iOS. Here at lastminute.com, we’re no exception. Some of our mobile team developers have taken on the challenge presented by iOS widgets, and over the past few months, we’ve also been diligently working on creating the Android version of the existing iOS widgets.
The project’s goal was not only about the challenge, but to also follow their same principles. We wanted to update ourselves and introduce cutting-edge technologies, architectural patterns and the latest libraries promoted by Android. We wanted to try out Kotlin, Jetpack Compose and some of the latest Jetpack libraries that would help on our journey, and learn the new principles promoted by the Android Relations team on how to build android native apps, which is not that far from what we do in React Native on a daily basis.
Challenge 1: Can we work with Kotlin in a React Native project?
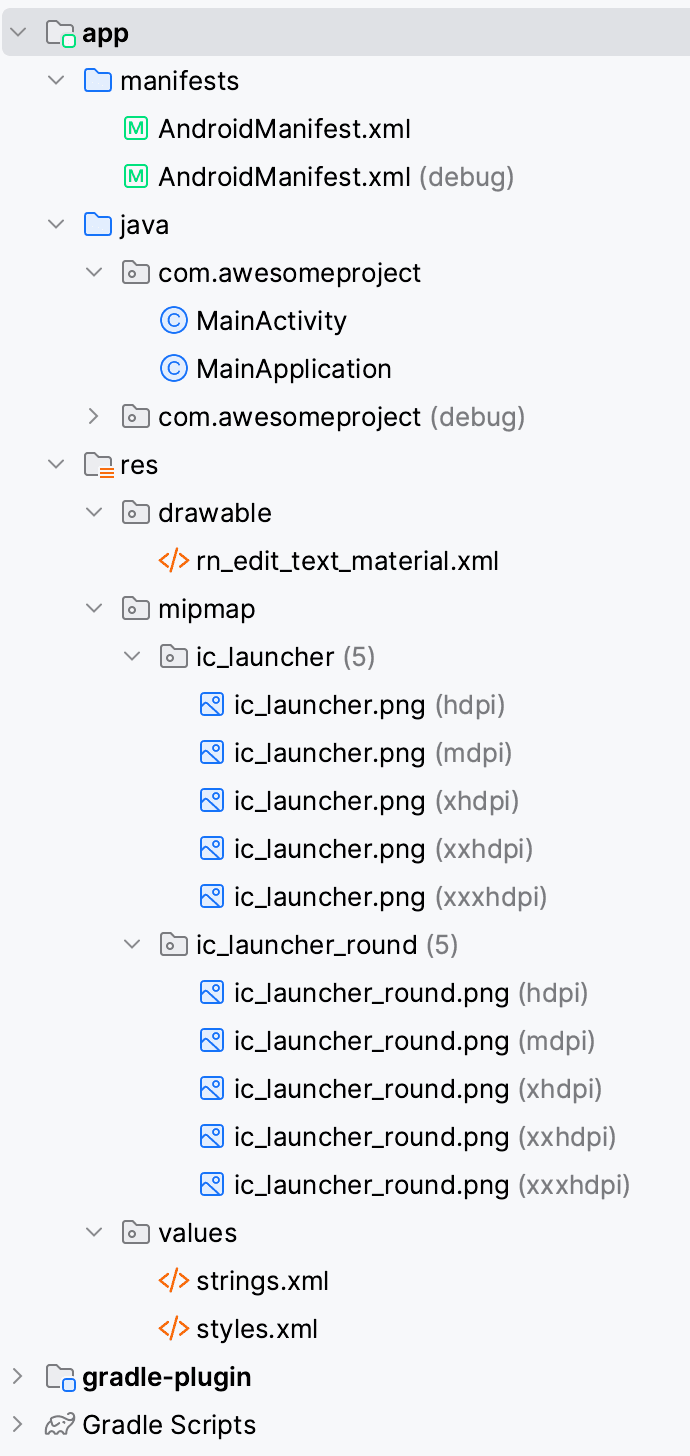
We wanted to work with Kotlin. However, looking at any React Native project, the Android native side of it is about a single module with the minimum required files to compile an android application, all of them made in Java + XML.

Turns out this setup is no different from any other old Android Native project, and there are some simple steps to follow to start working with Kotlin together with Java showcased in this guide.
Steps are about:
- Defining the Kotlin version you want to use and source in the Kotlin plugin. The chosen version should work with the android Gradle tools version in use:
// Project build.gradle file.
buildscript {
    ext.kotlin_version = '1.4.10'
    ...
    dependencies {
        classpath "org.jetbrains.kotlin:kotlin-gradle-plugin:$kotlin_version"
    }
}- Apply the Kotlin plugin on the app module and add the Kotlin lib dependencies.
// Inside each module using kotlin
plugins {
    ...
    id 'kotlin-android'
}
...
dependencies {
    implementation 'androidx.core:core-ktx:1.3.2'
    implementation "org.jetbrains.kotlin:kotlin-stdlib:$kotlin_version"
}
Those simple steps are enough to start adding and compiling Kotlin code in our React Native project.
Challenge 2: Can we apply the suggested architecture principles?
There’s much ground to cover on this matter. The guide to app architecture is extensive and includes numerous patterns we can implement. However, there was a fundamental question we sought to address before diving into this: how do we decouple our side project from the main one?
We realised that the work would take weeks and months to complete, and we didn’t want to affect nor break the main app while working. There are several ways to achieve this requirement, but again we wanted to follow Android’s best practices. And lucky us, they got an answer for us: modularisation to the rescue!
Android’s suggested way to decouple features is to create isolated modules that can be plugged into our final application. This not only helps to decouple the code by feature, but also improves:
- compiling speed, by compiling only the modules that are plugged into the target application.
- reusability by sharing code across features, sourcing utility modules.
- dependency management by adding third party dependencies to the module who needs it, so they are added into the final app only where required.
Now, we have the capability to develop our widgets as distinct modules and make progress on the new codebase without impacting the final application. We can seamlessly integrate these modules into the app whenever we choose to. Amazing!
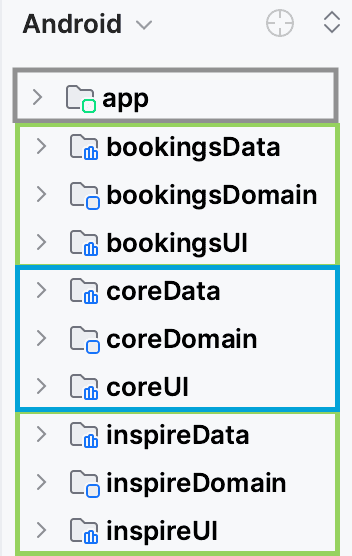
After that, we can freely think on which kind of architecture to use on our widget modules. Inspired by the modularization guide, we created something closer to the Android suggested architecture, but with some slight differences. Taking into account the input of some of the team members who used to work in Android native projects in the past, this is how the current project structure looks like nowadays.

We defined our modules by the following two principles:
- We should split by levels. Following the Android guidelines, we defined 3 levels:
- App level, which integrates all the features (existing app module from React Native project).
- Features level, which defines a business unit (each of our widgets).
- Service level, which encapsulates the shared utilities each of the features require (called Core in our case).
- We should split by layer. Following clean architecture principles, we have 3 layers:
- Domain layer, which contains all business logic agnostic to any third party library (even android libraries).
- UI layer, which contains all end user views and the required elements for them to work (activities, fragments, view models, UI state models, adapters, and so).
- Data layer, which holds the interface to third party data services (such as storage, APIs or any other) and their data models and adapters.
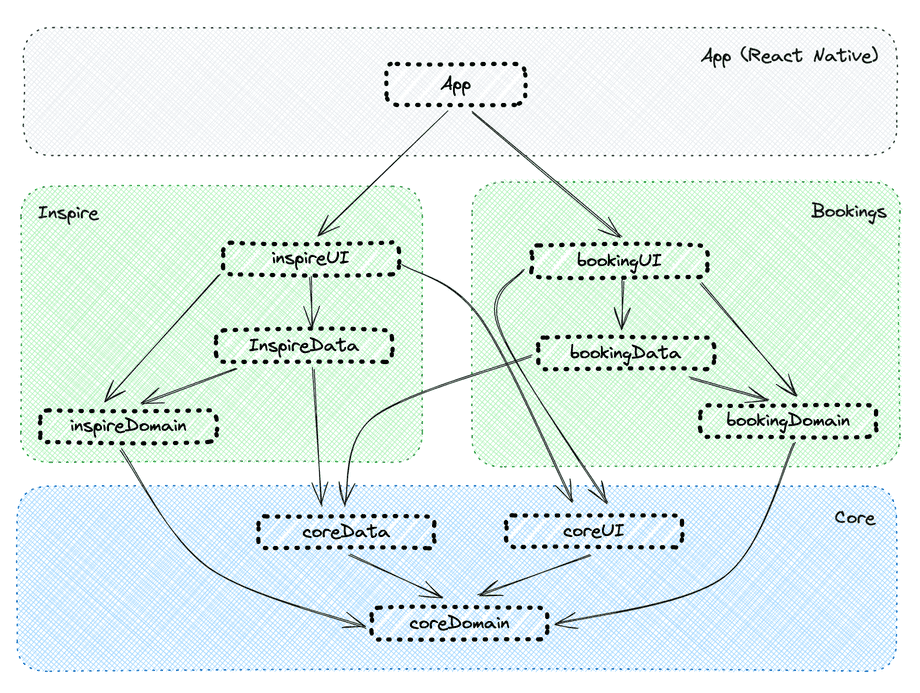
So in the end, each of our android modules represents a layer of a level unit. Like CoreData is associated with the Data layer of the Core unit from the Service level, or the InspireDomain represents the Domain layer of the Inspire unit from the Feature level.
This is what the dependencies between modules look like:

Does it seem a bit complex? We will enter into details on why we went with this approach later on for sure. All you need to look right now is that each of the features has an entry point on their proper UI module.
So let’s get back to the main question and show that by following the modular approach and with a single line of code, we can plug in our widgets into the app as below:
// Inside the app module
...
dependencies {
    lastminuteImplementation project(":inspireUI")
    //    lastminuteImplementation project(":bookingsUI")
}
Challenge 3: Can we use Jetpack Compose to build a widget?
Last but not least, we stated we really wanted to work with Jetpack Compose, but is this possible to achieve when working with Widgets? At the time we raised the question, Jetpack Glance library was recently born to answer our call, but due to its alpha state we weren’t fully sure if we wanted to stick with it. Jetpack Glance gave us the possibility to work with a subset of Jetpack Compose, but following most of the same development principles, so we decided to give it a try. We are now confident to say it was the right choice to make. During the months we’ve been working with it the library became stable in July 2023. Documentation grew a lot, and interoperability with other Jetpack libraries, such as Datastore for state management and WorkManager for background synchronisation, made our development an enjoyable experience.
Answered our three challenges, we were ready to work on our Android Widgets, taking advantage of the full android native experience. How we did it will be part of a different blog post, so stay in touch!


